

Common HDPE Butt Fusion Welding Defects and How to Avoid Them
Table of Contents
HDPE butt fusion welding defects like cold welds, misalignment, contamination, and improper bead formation cause costly joint failures. This guide explains each defect, its root causes, correct parameters, inspection methods, and a practical checklist to help engineers and buyers ensure reliable, defect-free pipeline joints.
What Are HDPE Butt Fusion Welding Machines Defects?
Structural flaws like cold welds, misalignment, and surface contamination define HDPE butt fusion welding machines defects. These issues pop up when the molecular chains of two thermoplastic pipe ends don’t fully entangle during thermal fusion. Spotting and stopping these imperfections is absolutely vital. If you ignore them, you risk dropping pipeline pressure ratings and inviting massive system blowouts.
How does HDPE butt fusion welding work?
Thermofusion drives the entire process. You heat two identical polyethylene (PE) pipe ends at the same time using a highly precise hot plate until they reach a viscous flow state. Once the material hits the perfect molten consistency, you pull the heating plate away and press the ends together using controlled hydraulic pressure. As the plastic cools down, polymer chains diffuse across the planar interface and tangle together. Do this right, and the resulting integrated joint will match—or even surpass—the original pipe’s strength.
What counts as a weld defect vs. an acceptable joint?
A solid, acceptable joint features a perfectly planar interface. You’ll see a smooth, symmetrical bead rolled back neatly against the pipe surface, and its tensile strength will rival that of the native material. On the flip side, a weld defect shows up as a clear structural anomaly. You might spot asymmetrical flange curling, severe high-low misalignment, or surface flaws like bubbles, pitting, and depressions. Beneath the surface, these defects mean incomplete molecular entanglement, which ruins the mechanical integrity of the joint.
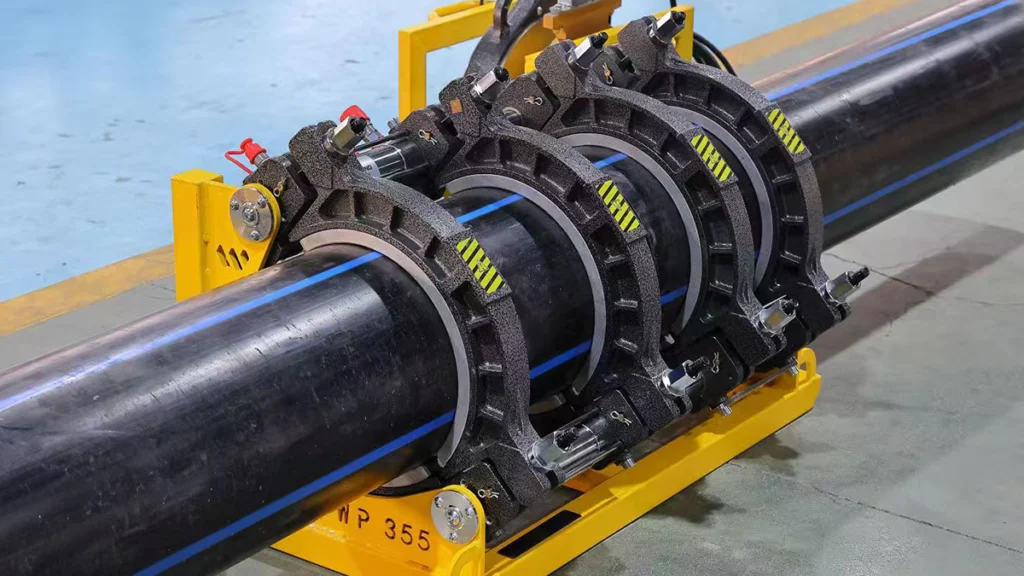
Why do butt fusion machines defects compromise pipeline integrity?
Flaws create localized weak points and dangerous stress concentrations across your piping system. Whenever a joint deals with misalignment or dirt, that physical barrier stops polymer chains from properly diffusing. Add operational loads to the mix, and these stress zones quickly become breeding grounds for micro-cracks. Over time, shifting pressure and environmental strain tear at these vulnerabilities. The end result? Leaks, or worse, total joint separation.
Why HDPE Butt Fusion Machines Defects Are Costly in Pipeline Projects
Long-term failure risk and pressure rating loss
Bad fusion joints are a ticking time bomb for failure under longitudinal tension, burst pressure, and long-term creep rupture. Without complete molecular fusion, a pipeline’s overall pressure rating tanks. Imagine a system engineered to handle 1.6 MPa (PN16). If the joints hide cold welds or heavy stress concentrations, that system could blow at a mere fraction of its intended capacity, cutting the infrastructure’s lifespan short.
What is the real cost of a failed fusion joint?
The financial fallout of a bad joint goes way beyond buying a piece of replacement pipe. Fixing just one defective weld eats up roughly 5 to 7.5 hours of direct labor. That doesn’t even count travel time or prepping the site. Throw in heavy machinery costs, excavation work, environmental mitigation, and the sheer pain of system downtime, and the true price tag of a standard butt fusion error skyrockets. It absolutely wrecks project margins.
Liability, downtime, and rework in field projects
Rushing to hit a deadline—especially in terrible conditions like freezing rain or high humidity—fuels defective welds. Moving too fast triggers expensive rework and grinds operations to a halt. For utility companies and pipeline contractors, a ruptured water or gas main tied to a preventable HDPE pipe joint failure brings massive liability. It damages your reputation and often triggers severe legal headaches.
Factory-direct pricing with technical consultation included
Get Your Free QuoteThe Most Common HDPE Butt Fusion Welding Machines Defects
Cold welds and incomplete fusion
A cold weld strikes when the molten polyethylene cools down before you can pressurize the joint. Usually, this happens because the operator took too long switching from removing the heating plate to applying fusion pressure. A “cold skin” hardens over the molten pipe ends. This creates a physical wall that stops molecular chain diffusion dead in its tracks. The joint might look perfectly fine on the outside, but internally, it lacks any real structural integrity.
Misalignment and high-low offset
High-low offset, or misalignment, pops up when the two pipe ends aren’t perfectly concentric during fusion. Engineering standards make it clear: misalignment cannot exceed 10% of the pipe’s wall thickness. Push past that critical limit, and you create intense stress concentration right at the joint interface. This cripples the weld’s capacity to handle longitudinal stress and sets the stage for premature failure.
Improper bead size, shape, and double-bead issues
Bad fusion parameters directly cause improper bead formation. When you fail to control material flow during the viscous state, you get asymmetrical flange curling, undersized beads, or weirdly shaped double-beads. If you crank the pressure too high or mess up the heat soak time, the molten plastic squishes out of the fusion zone instead of entangling. This leaves you with a thoroughly compromised weld interface.
Contamination, oxidation, and surface defects
Skipping the cleaning and prep phase is a guaranteed way to cause leaks. You have to use mechanical facing to strip away surface oxidation layers, moisture, dust, and chemical impurities before welding. If any junk stays on the pipe ends during the heating phase, it bakes permanently into the joint.
Root Causes Behind Butt Fusion Welding Defects
Incorrect temperature, pressure, or timing
Most structural flaws trace back to messing up core fusion parameters. Too much drag pressure shoves molten material right out of the weld zone. On the flip side, cutting the cooling time short lets the joint spring back before the polymer chains fully lock into place. Likewise, running your heating plate outside the correct temperature window stops the plastic from reaching the exact viscous flow state needed to fuse properly.
Why does contamination cause fusion failure?
Dirt and debris act as an impenetrable wall at the planar interface. Polyethylene fusion works entirely through the random movement and tangling of polymer chains across the joint boundary. Throw oil, mud, or an old oxidation layer into the mix, and you block that molecular handshake. The chains fail to mix. Instead of a molecularly fused bond, you end up with two pipes weakly glued together by a layer of trash.
Equipment calibration and machine condition issues
Trying to save money by using semi-automatic welders without strictly following the specs is a fast track to defects. Even fully automatic welders cause problems if they have worn hydraulic seals or terrible calibration, leading to erratic pressure application. If your machine can’t accurately gauge and apply the calculated fusion pressure, the weld will fail—no matter how skilled the operator happens to be.
Operator error and procedure deviation
Human error is still a massive driver of pipeline failures. Ignoring specified fusion clamps and roller supports leads to sloppy joint alignment and sky-high drag pressure. When operators rush the job in wet weather, skip wiping down the heating plate, or try to force-cool the joint, they directly violate proven HDPE pipe fusion machine standards.
Get detailed specs and custom configuration options
Request Technical SpecificationsCorrect HDPE Butt Fusion Welding Parameters
Recommended heater plate temperature range
Nailing the precise HDPE pipe electrofusion welding machines temperature and pressure settings is an absolute must. Usually, the ideal heater plate temperature sits between 200°C and 230°C. Keep in mind that regional standards dictate strict ranges. The European standard (DVS 2207-1) demands 200–220°C, while the US standard (ASTM F2620) pushes for 400–450°F (204–232°C). Operators have to match these heat levels to the exact resin characteristics of the pipe they are working with.
Fusion pressure and drag pressure calculation
Getting the pressure right means calculating theoretical fusion pressure alongside dynamic drag pressure. Heat soak pressure (absorbent pressure) generally sits at about 1/10 of the main fusion butt welding pressure. Drag pressure—the hydraulic muscle needed to beat friction and slide the movable carriage—isn’t static. You must measure it dynamically for every single weld and add it to your baseline fusion pressure to guarantee solid interfacial contact.
Heat soak and cooling time by pipe diameter and SDR
Fusion butt joint times and cooling cycles scale directly with the pipe wall thickness (SDR) and the cross-sectional area of your fitting.
| Parameter Phase | DN160 SDR 11 (Example) | DN315 SDR 17 (Example) | Critical Control Factor |
|---|---|---|---|
| Heater Temperature | 210°C ± 10°C | 210°C ± 10°C | Verify with a calibrated surface pyrometer |
| Heat Soak Time | ~140 seconds | ~185–190 seconds | Keep only light contact pressure during heat soak |
| Max Switching Time | ≤ 8 seconds | ≤ 10–11 seconds | Complete plate removal and pipe closing quickly to avoid cold welds |
| Cooling Time | ~15–16 minutes | ~20–25 minutes | Keep the joint fully clamped and avoid movement during cooling |
*Note: Always check the specific HDPE butt fusion welding parameters chart from your pipe manufacturer and refer to the applicable regional standard.*
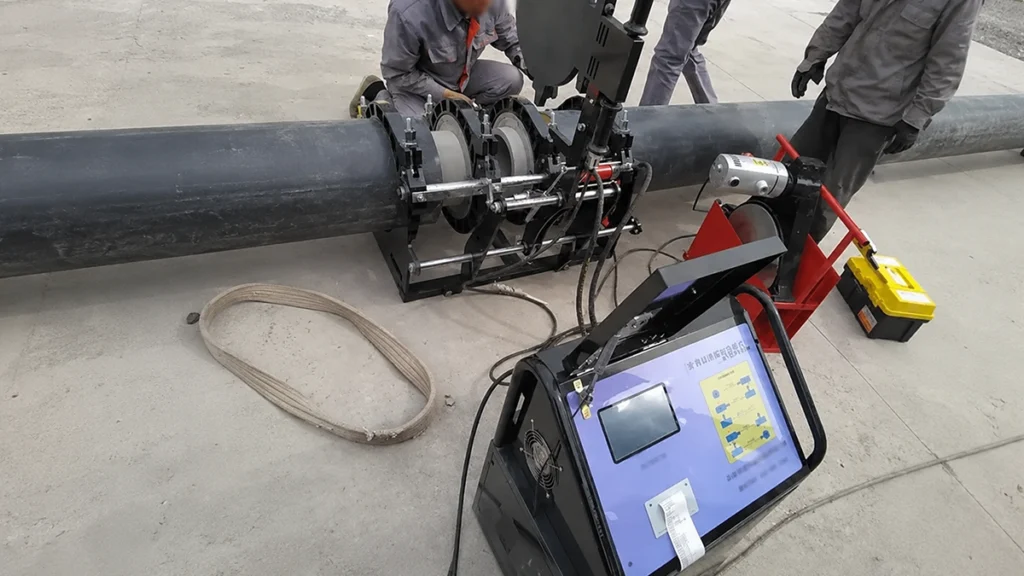
Step-by-Step Butt Fusion Procedure to Prevent Defects
Pipe preparation, clamping, and facing
Great prep work guarantees a successful operation. Cut the pipe ends perfectly perpendicular at 90° and lock them tight in the plastic pipe welding machine clamps. Next, mill the connecting surfaces with a facing tool until you see continuous, unbroken shavings peeling off both ends. After facing, check the gap between the closed ends—it cannot exceed 0.3mm. Finally, verify that any high-low misalignment stays strictly under 10% of the wall thickness.
Heating, fusion, and pressure phases
The thermal cycle relies on highly monitored, distinct phases. It kicks off with the edge rolling stage, applying initial pressure against the heater plate to build the primary bead. Then comes the heat absorption (soak) stage. Here, you drop the pressure to almost zero, letting the heat sink deep into the pipe wall. The conversion (switching) stage follows, requiring lightning-fast removal of the plate. Finally, the joint pressurization stage drives the ends together at the exact calculated total pressure.
Cooling and joint release best practices
Cooling is the phase operators rush the most. Don’t do it. The machine clamps must hold the pipe and fitting firmly under steady hydraulic pressure so the joint can cool naturally. Only pop the clamps open after the cooling cycle is fully complete to avoid springback and internal stress fractures. Never throw water, wet rags, or forced cold air at the joint to speed up the process.
How to Inspect and Verify Butt Fusion Weld Quality
What does a good fusion bead look like?
Visual checks are your first line of defense. A solid, compliant fusion bead creates a smooth, symmetrical flange wrapping entirely around the pipe’s outer circumference. Look for a uniform double-roll bead that curls back to touch the pipe surface. It should be totally free of V-shaped notches, pitting, or trapped dirt. If the profile looks uneven or flawed, investigate it immediately.
Bend test, tensile test, and other validation methods
Field and lab tests prove joint integrity. Out on the site, non-destructive testing often involves the “bend test.” You cut and peel back a 10-15mm sample strip from the bead to hunt for interface damage or telltale signs of cold weld vs incomplete fusion HDPE characteristics. Back in the lab, validation leans on the high-speed tensile impact test (ASTM F2634) and the whole pipe tensile creep rupture test (EN 12814-3) to confirm the weld is just as tough as the parent plastic.
Data logging and traceability for QA records
Modern, fully automatic butt fusion machines take the guesswork right out of quality control. These setups let operators print welding process parameter record sheets directly on-site or save them digitally for future QA audits. This 100% traceability means every joint’s pressure, temperature, and timing data is locked in, offering hard proof that the weld met brutal engineering specs.
Relevant Standards and Specifications for Butt Fusion Welding Machines
ISO 21307, DVS 2207, and ASTM/PPI references
Global pipeline networks run on strict engineering standards. ISO 21307 serves as the international rulebook for PE piping butt fusion, outlining both low and high-pressure parameters. Over in Europe, DVS 2207-1 leads the charge, focusing heavily on low-pressure welding techniques (around 0.15 N/mm²). Meanwhile, the United States relies on ASTM F2620, which dictates a high-pressure approach paired with hotter heater temperatures.
How standards define acceptance and rejection criteria
Standards map out butt fusion welding bead inspection criteria and structural acceptance by relying heavily on laboratory tensile testing. A weld passes when the energy needed to snap the specimen during a tensile test forces the break to happen in the native pipe material, not the weld interface. If the plastic shears cleanly right at the fusion line, the joint is instantly rejected as a defect.
Which standard applies to your project region?
Global contractors must grasp regional compliance. The ISO 21307 HDPE butt fusion welding machines requirements dominate metric countries, blanketing roughly 95% of the worldwide market. On the flip side, ASTM F2620 stands as the primary operational and legal standard in the US. You have to calibrate your equipment and parameters to match the specific standard demanded by your project’s geography and engineering design.
Choosing the Right Machines and Materials to Avoid Defects
Manual vs. hydraulic vs. fully automatic fusion machines
Picking the right equipment architecture is the smartest way to engineer defects completely out of your workflow.
| Machine Type | Control Mechanism | Defect Risk Level | Best Application |
|---|---|---|---|
| Manual | Operator physical force | High (inconsistent pressure) | Small diameter non-critical plumbing |
| Hydraulic (Semi-Auto) | Manual hydraulic valves | Medium (relies on operator timing) | Standard municipal water/gas lines |
| Fully Automatic (CNC) | Computer-controlled hydraulics | Low (eliminates operator error) | High-pressure gas, mining, critical infrastructure |
Fully automatic butt fusion welding machines actually monitor the ambient temperature (tweaking times by 0.5–1% per °C of variance) and will shut down the process if parameters drift. This drastically cuts down on human error.
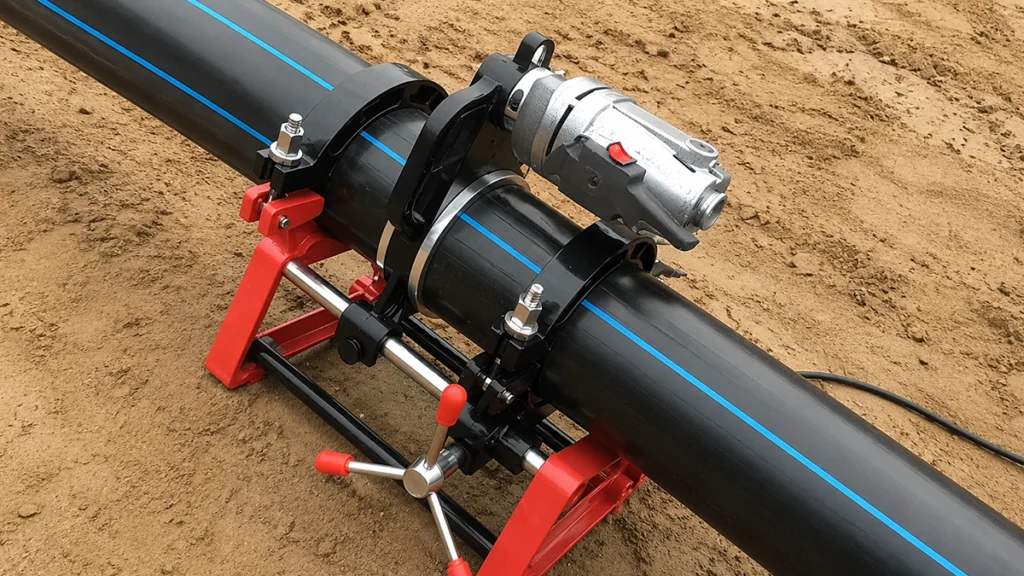
How does pipe and fitting quality affect weld outcomes?
Material compatibility is non-negotiable. If you try to weld incompatible plastics—like fusing a PE80 pipe straight to a PE100 pipe without specific transition protocols—you’ll end up with defective welds because the melt flow indexes simply don’t match. To guarantee uniform heat absorption and a symmetrical bead, pipes and fittings must share the same Standard Dimension Ratio (SDR) and compatible PE grades.
Supplier and resin consistency considerations
Operators need to stay sharp because thermal stability varies between pipe manufacturers. Even within the exact same PE100 classification, different resin batches might melt a little differently. You have to align your butt fusion welder parameters to the specific characteristics of the material on site. Often, this means running test welds at the beginning of a new batch to dial in the perfect heating times.
Best Practices Checklist to Eliminate Butt Fusion Defects
Pre-weld preparation checklist
- Check the ambient temperature. Set up weather protection (like welding tents) if you are dealing with wind, rain, or freezing conditions.
- Scrub the heating plate clean using anhydrous ethanol and a lint-free cloth.
- Deploy roller supports to keep the pipe perfectly horizontal and cut down on hydraulic drag pressure.
- Mill the pipe ends until you get continuous, unbroken shavings peeling simultaneously from both sides.
- Make sure the milled gap is ≤0.3mm and high-low misalignment stays ≤10% of the wall thickness.
In-process control checklist
- Verify that the heater plate temperature holds steady within the 200–230°C window (or whatever your specific standard requires).
- Dynamically measure and record the drag pressure before you start every single weld.
- Apply the exact total fusion pressure required (your calculated fusion pressure plus your measured drag pressure).
- Keep the switching time (when you pull the plate out) as short as humanly possible to stop cold skin from forming.
Post-weld verification and documentation
- Keep the pipe locked tightly in the machine clamps under full pressure for the entire cooling cycle.
- Never use fans, water, or wet rags to artificially rush the cooling process.
- Visually inspect the symmetrical bead to ensure it has a uniform size and a proper double-roll profile.
- Run a daily on-site bend test using a sample strip to confirm the interface is solid.
- Print and log the welding parameter record sheet to maintain strict QA traceability.
FAQ
Q1: What causes a cold weld in HDPE butt fusion welding?
An excessive delay during the switching phase—between pulling out the heater plate and applying fusion pressure—is the main culprit behind cold welds. This lag lets the molten polyethylene cool down too fast, creating a hard “cold skin.” This skin acts like a wall, stopping the polymer chains from tangling together and leaving you with a dangerously weak joint.
Q2: How can you tell if a butt fusion joint is defective?
You can often spot a bad joint by looking for visual red flags like undersized beads, asymmetrical flange curling, heavy high-low misalignment, or pitting on the surface. However, tricky defects like cold welds might look perfectly fine on the outside. To know for sure, you need destructive testing—like a high-speed tensile impact test or a bend test—to prove the pipe material fails before the weld interface does.
Q3: What is the correct temperature for HDPE butt fusion welding?
The right temperature hinges entirely on the standard you follow. As a rule of thumb, heater plates run between 200–230°C. If you operate under the European standard (DVS 2207-1), aim for 200–220°C. If you use the US standard (ASTM F2620), you need 400–450°F (204–232°C). Always double-check your plate with a surface pyrometer and follow the pipe manufacturer’s exact guidelines.
Q4: How much misalignment is acceptable in a fusion joint?
Strict engineering standards cap high-low misalignment at 10% of the pipe’s total wall thickness. If you push past that limit, you create dangerous stress concentrations right at the joint interface. These localized stress points wreck the pipeline’s pressure rating and dramatically raise the odds of long-term creep rupture when the system is under operational load.
Q5: Can a defective HDPE fusion weld be repaired or must it be re-cut?
You cannot patch, reheat, or repair a bad HDPE fusion weld. If a joint fails a visual check, QA testing, or data logging verification, you have to cut the entire defective section out of the line. From there, you must re-face, re-align, and fuse the pipe ends all over again using the correct pressure and thermal parameters.
Q6: What standards govern HDPE butt fusion weld acceptance?
The heavy hitters in global standards include ISO 21307 (International), which lays out both high and low-pressure parameters; DVS 2207-1 (European), which targets low-pressure welding; and ASTM F2620 (USA), which dictates high-pressure methods. On top of that, standards like ASTM F2634 and EN 12814-3 control the laboratory tensile impact testing used to officially accept or reject a weld.
Q7: How long should an HDPE fusion joint cool before handling?
Cooling times tie directly to the pipe’s wall thickness (SDR) and diameter. The pipe needs to stay clamped in the fusion machine under steady pressure for the whole calculated cooling cycle, which easily hits 15 to 30+ minutes for massive pipes. Pulling it out early or dumping water on it to speed things up will trigger massive internal stress and guarantee joint failure.
Q8: Does pipe contamination really affect fusion weld strength?
Absolutely. Contamination is a massive driver of catastrophic joint failures. Moisture, dust, oil, or an old oxidation layer creates a physical blockade at the planar interface. Because HDPE fusion relies 100% on polymer chains entangling, any dirt stops that molecular handshake from happening. The result is a joint destined to rupture or leak.
Conclusion
Wiping out HDPE butt fusion welding defects demands strict, stubborn adherence to the core parameters of time, pressure, and temperature. You also need top-tier, perfectly calibrated equipment. Most structural flaws—whether they take the form of cold welds, dirt contamination, or poor alignment—are completely preventable. You just need to execute rigorous pre-weld prep, keep conversion times incredibly short, and enforce proper cooling under steady hydraulic pressure.
Grounding your field operations in recognized global specs like ISO 21307, ASTM F2620, or DVS 2207 gives project managers a rock-solid baseline for quality assurance. Moving away from manual or semi-automatic setups in favor of fully automated fusion technology takes the guesswork completely out of the operator’s hands. These advanced systems adjust on the fly to ambient conditions and deliver 100% data logging traceability. Putting money into that kind of precision lets pipeline contractors slash the risk of massive failures, dodge the brutal financial hit of a 7-hour repair delay, and lock in the long-term integrity of the infrastructure.
Let our experts help you choose the right equipment for your project
Contact Our Engineering Team